Sunday 27 April 2014

How To Make Compost For Your Balcony Garden

I set out on making a compost pail for the balcony this weekend and I found this great "how-to" video made by "crazyaboutcompost.com". It's really not that hard at all to start composting on the balcony. 
.
.
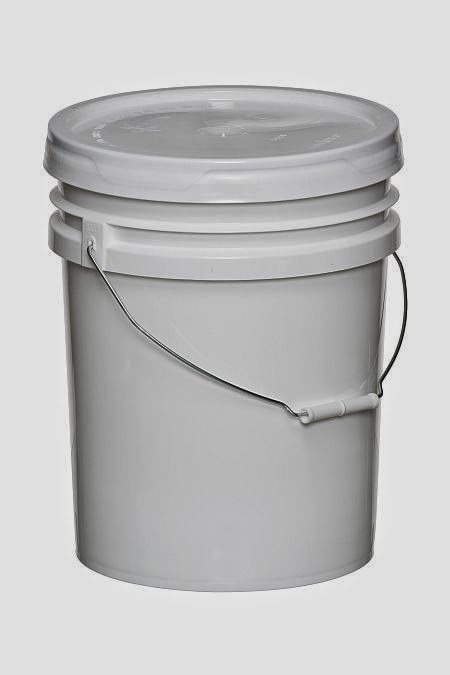
Step #1 - Get two plastic buckets and a drill.
.
.
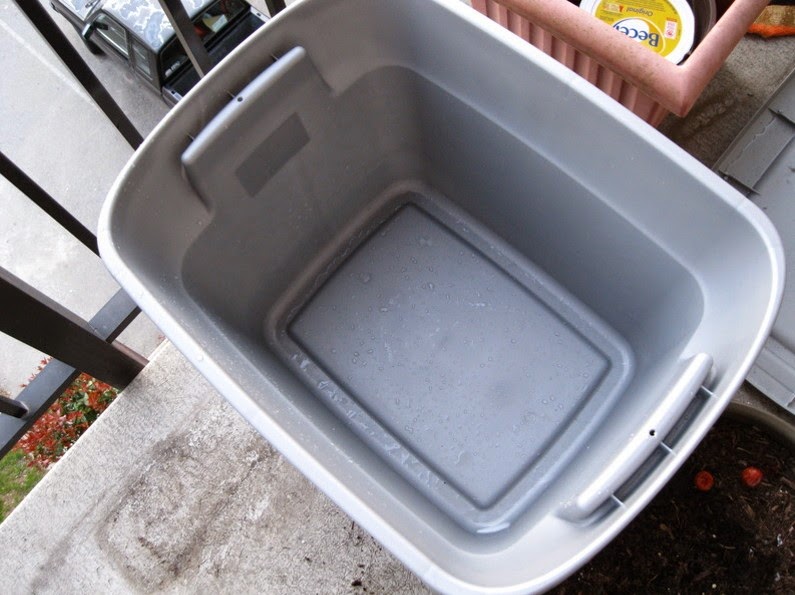
Step #2 - Drill several holes throughout one bucket to provide both air and drainage for your compost. Place the bucket with the drilled holes inside of the other pail, to capture run-off moisture and keep your balcony clean.
.
.
Step #3 - Add a layer of "brown" materials, such as sawdust, shredded cardboard or paper.
.
.
Step #4 - Add a layer of "green" material, such as leaves or grass clippings, like the ones I pinched from the yard-maintenance crew when they mowed the complex's lawn the other day.
.
.
Step #5 - Add your food scraps like coffee grounds, fruit cores, vegetable peels, and any garden refuse. You can basically add anything organic that isn't from an animal - except for egg shells, those are okay too. After some organic refuse has built up, cover it with more greens and repeat the process.
.
.
Step #6 - Continue adding layers as the compost builds in the bucket, occasionally stirring the mix. If the mixture gets too dry, you may need to add water to it, although with the moisture in material like grass clippings there likely won't be any need to add water.

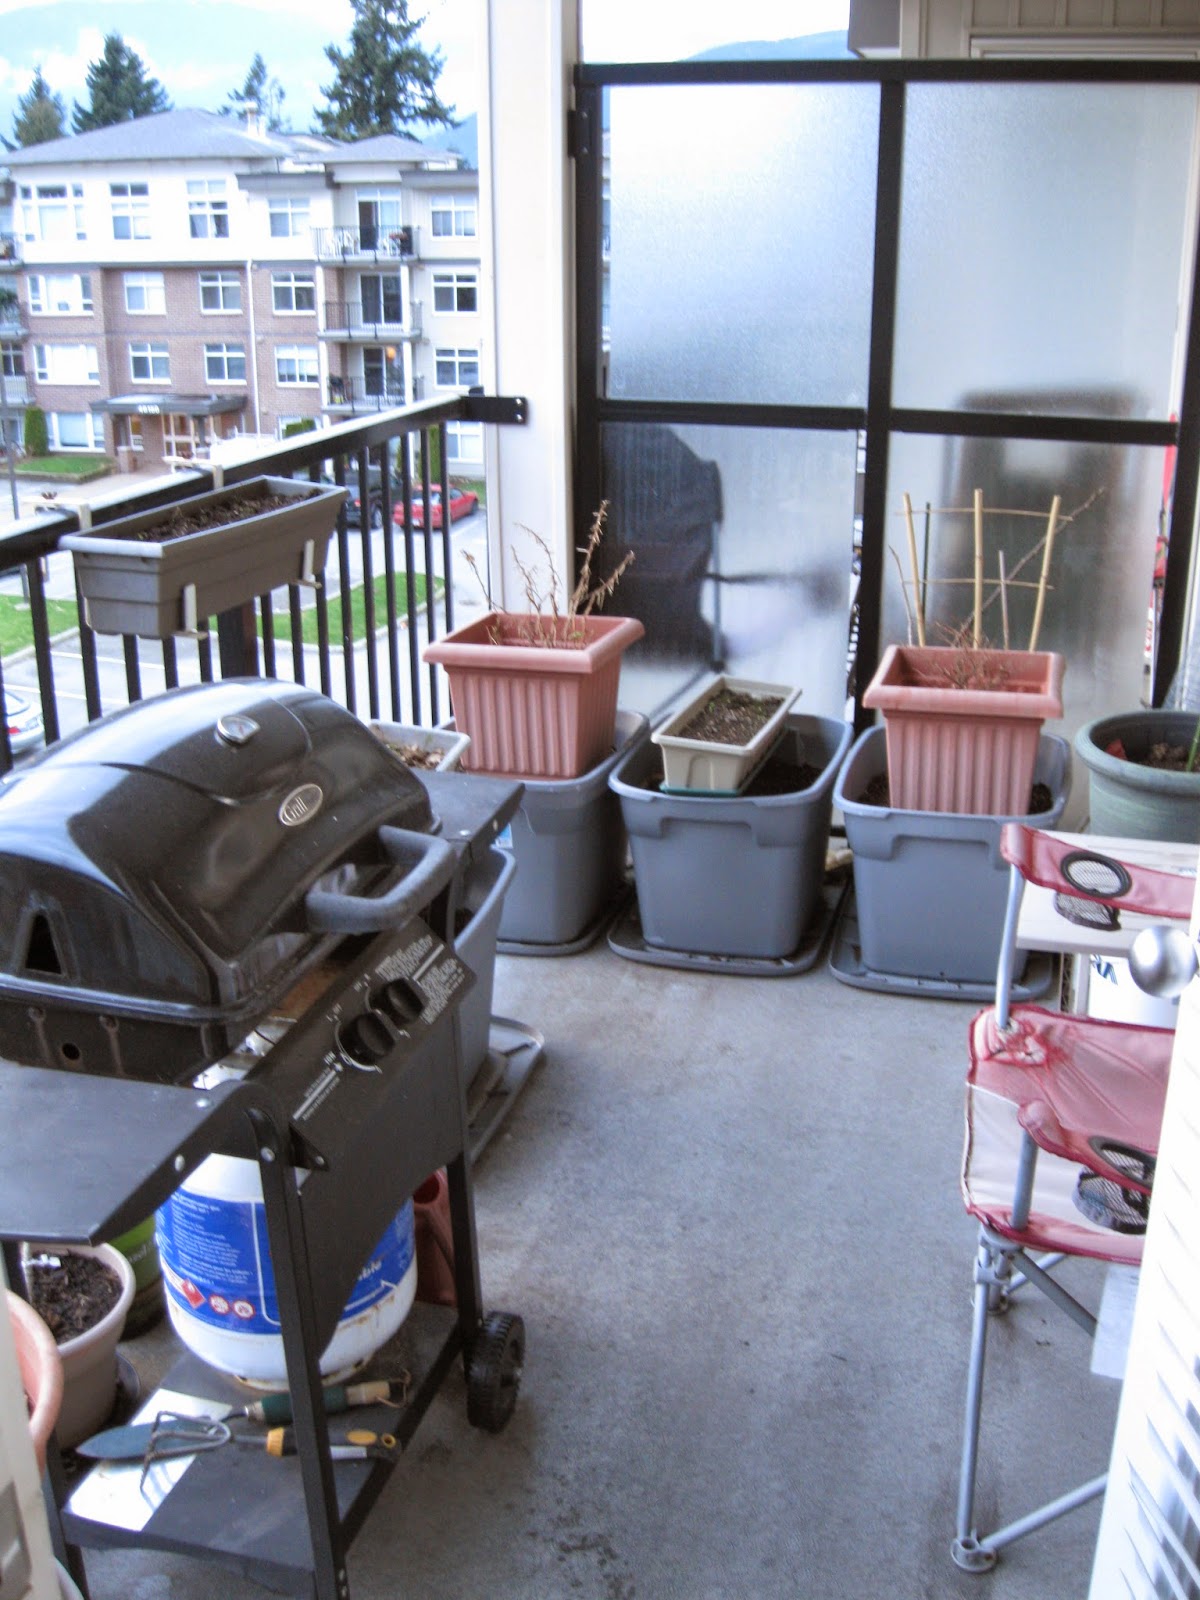
You don't necessarily need to leave the lid on the bucket, but I'm going to because it gives me another place to keep a pot, although, I think I'll keep the lid slightly ajar to let in more air. In a few weeks, there should be compost ready to spread on the plants.
.
----------------------------------------------------------------------------------------------------------------------------
.
The Composting Journal
.
May 22, 2014
.

.
The compost has been going for around a month now, with me turning it over about once a week. It's starting to look pretty good down below, and has that rich (smelly) fertilizer smell to it. The bucket was about half full, so I used it and spread it around the garden since I haven't fertilized at all this year yet. Next year, I should get a compost bucket going a little earlier in the season so I can give the plants a jump-start right away.
.
Note - During this time, I did add an empty olive jar underneath the main bucket, to raise it out of the second bucket and create more airflow.
.
----------------------------------------------------------------------------------------------------------------------------
.
February 26, 2015
.
The first thing I did was go through the compost pail. Composting has been a mixed success for me so far. As you can see in the buckets below, there is a lot of nice, loamy soil that has been created - but not all of it composted equally. On the right you can see the remains of last summer's potato plants, which obviously did not fully decompose, so I picked most of it out and threw it into the trash before spreading the rest around in the pots on the balcony.
.

.----------------------------------------------------------------------------------------------------------------------------
.

Friday 25 April 2014

How Much Does The Balcony Garden Cost? How Much Does It Produce?

I'm going to try and keep a running record of my expenses for the balcony over the years, to figure out just what kind of an "investment" it turns out to be.

Year One
.
.
While technically this is my third year of having plants on the balcony, I only bought pots for the first year and not the second. Thus, year one and two were virtually identical and so I am simply going to count them both as "Year One."

For the first year's items, which were basically just some planter boxes, a railing hanger, four bags of soil, and a few plants, I no longer have receipts. If I recall correctly, it cost around $180 (including the plants), with by far the most expensive item being the hanger for the box on the railing, which cost over $40! I really like the idea of lining the railing - on both sides - with planter boxes, but my goodness, at that price putting up another five or six boxes would cost me $250-$300 just for the hangers alone! It's quite silly, the box costs between $15 and $20, but the device to hang it on is worth two to three times as much. There has got to be a better solution. In fact, if I could go back in time, I would tell myself not to bother buying new planter boxes from the store anyway, as you can find all sorts of things to plant in for much cheaper - plus, people are always getting rid of old pots and stuff and free is the best price of all. At any rate, I'm going to peg the investment for Year One at $150, which excludes the plants I bought for them which no longer exist - except for three strawberry plants.

Total Expenses = +/-$150
.
.
The amount I harvested from these containers was negligible, although it was still fun growing them and it was nice to have a couple of fresh strawberries or cherry tomatoes to pop into your mouth on almost a daily basis by mid-summer.
.
--------------------------------------------------------------------------------------------------------------------------------------
.
Year Two
.
April 23, 2014
I have kept all the receipts for everything I bought for this year, so I will be able to keep a much more accurate tally on expenses from here on out.

Permanent Fixtures & Perennials
4 x Rubbermaid Containers = $29.88
14 x Bags of Soil = $55.86
1 x Wire Mesh Grate = $12.86
2 x Zip-Tie Packages = $4.80
3 x 18.9litre Pails with Lids = $22.11
1 x Blueberry Dwarf Bush = $24.99
1 x Raspberry Dwarf Bush = $34.99
1 x Strawberry Plant = $2.49
1 x Kitchen Scale = $10.99 
May 22, 2014
    1x Owl Statue/Scarecrow = $9.99
    1x Bamboo Trellis = $5.99 
Total = $214.94 x 12% Tax = $240.94

Annuals for 2014 
1 x Climbing Bean Seed Package = $1.99
1 x Radish Seed Package = $1.99
1 x Carrot Seed Package = $2.29
1 x Cucumber Seed Package = $2.49
1 x Hot Pepper Mix Seed Package = $2.49
1 x Sweet Pepper Mix Seed Package = $2.49
1 x Nasturtium Seed Package = $2.19
1 x Grand Rapids Lettuce Seed Package = $1.89 
                                        3 x Petunias = $3.87
                                        3 x Mesclun Mix Lettuce = $4.47
June 19, 2014
3 x Great Lakes Lettuce = $4.47
6 x Red Russian Kale = $8.94
1 x Tomato Plant = $1.99
1 x Cherry Tomato Plant = $1.99
Total = $43.55 x 12% Tax = $48.78
.
Harvests for 2014 (Updated during season as harvested)
18oz Salad Greens x $1.88/lb = $2.12
20oz Red Russian Kale x $1.57/bunch (4.5oz/bunch) = $7.07
2oz Radishes x $2.49/lb = $0.31
8oz Strawberries x $3.80/lb = $1.90
30oz Tomatoes x $1.75/lb = $3.28 
9oz Cherry Tomatoes x $1.26/lb = $0.72
July 25, 2014
41oz Potatoes x $1.12/lb = $2.87
24oz Cucumbers x $2.06/lb = $3.09
3oz Carrots x $1.95/lb = $0.37
4oz Sweet Peppers x $2.24/lb = $0.56
4oz Hot Peppers x $3.09/lb = $0.77
Total = $22.22

The Profit = -$48.78 + $22.22 = -$26.56


.
----------------------------------------------------------------------------------------------------------------------------
.
Year Three
. 
Feb 22, 2015
April 22,2015
Permanent Fixtures & Perennials for 2015
1 x 30litre Bag of Soil = $3.99
Total = $3.99 x 12% Tax = $4.47

Annuals for 2015
1 x Kale Seed Package = $1.89
1 x Tomato Seed Package = $1.89
1 x Cucumber Seed Package = $1.89
1 x Zucchini Seed Package = $1.89
1 x Nasturtium Seed Package = $1.89
1 x Watermelon Seed Package = $1.89
1 x Cantaloupe Seed Package = $1.89
1 x Miracle Grow Singles = $5.99
May 14, 2015
Total = $19.22 x 12% Tax = $21.53

Harvests for 2015
22oz Kale
1oz Radish
3oz Salad Greens
Total = $
.


.

Thursday 24 April 2014

Dwarf Thornless Raspberry Shrubs

.
I bought a dwarf thornless raspberry shrub from Minter Country Garden, so when I say I am growing raspberries on my balcony, make note - these are specialized plants, rather than the regular raspberry plant. As such, I thought it would be a good idea to write down the information that came on the label, to keep a reference to what kind of raspberry plant I am growing, and its specifications.

Raspberry Shortcake offers everyone a chance to enjoy raspberries like never before. This revolutionary, thornless raspberry has an endearing compact, rounded growth habitat and thrives in a patio pot or in the landscape. Perfect for children and adults, this carefree patio raspberry requires no staking, or big garden spaces. Raspberry Shortcake produces full-sized, nutritious and super sweet raspberries mid-summer. 

Fruit Season: Mid-Summer

Berry Size: Medium

Flavor: Sweet/Vanilla Essense

Shrub Habitat: 2' - 3' Dense Compact Mound

Planting & Care Notes: Full Sun * Fairly Neutral Soil (pH 6.5 - 7.5) * Good Drainage * Fertilize Early Spring * Moderate Watering * If leaves yellow or droop in summer - water and use a balanced liquid fertilizer. No staking, trellis or companion pollinator required. 

This dwarf raspberry produces abundant new canes each spring and fruits on new canes that have gone through a winter dormancy period. Once fruiting is finished, prune out canes at the base that have fruited leaving new canes to fruit the next season. 

Note: Raspberry Shortcake is best suited to large patio containers and will fill it out no matter the shape! If you choose to plant Raspberry Shortcake in the ground, as with any raspberry, take care to plant in an open landscape or garden area where moderate spreading is tolerable.

Dwarf Blueberry Shrubs

.
I bought a dwarf blueberry shrub from Minter Country Garden, so when I say I am growing blueberries on my balcony, make note - these are specialized plants, rather than the regular blueberry plant. As such, I thought it would be a good idea to write down the information that came on the label, to keep a reference to what kind of blueberry plant I am growing, and its specifications.

Blueberry Jelly Bean - A Taste of Jelly Beam

Jelly Bean is a charming little puffball of a blueberrry producing a prolific crop of large, flavorful blueberries mid-summer. The gorgeous foliage of Jelly Bean features uniquely elongated leaves that range from brilliant to darker greens with highlights of red in cooler climates. Try a mini-hedge along the a pathway, in the landscape or in decorative patio containers. 

Fruit Season: Mid-Summer

Berry Size: Medium to Large

Flavor: Sweet/Like Homemade Jelly

Shrub Habit: 1' - 2' Compact, Spherical Mound

Spring Color: Bright Greens

Fall Color: Rich Green with Red Leaf Margins

Planting & Care Notes: Full Sun * Acidic Soil (incorporate peat moss or organic matter into soil). * Good Drainage * Fertilize Early Spring (granular or liquid acid fertilizer) * Moderate watering

Pruning: This blueberry produces new canes each fall and spring. Once fruiting is complete, prune canes that have fruited leaving new canes to the next season. Annual pruning promotes plant growth and berry production.    

Wednesday 23 April 2014

How to Attach an Umbrella to Your Balcony Railing

I've been asking the Great Wizard (aka Google) how to attach an umbrella to a balcony railing. I would like to have one to try and control the extreme heat on my balcony during the summers. With the balcony facing West, that deck can get just roasting hot on a sunny afternoon and it is unbearable to sit out there until the sun goes behind the mountain late in the evening. Several people in my complex have patio tables with umbrellas on their balconies, but a year or so ago, there was one place that had an umbrella simply attached to the railing, which is what I would like.
https://www.thingiverse.com/thing:118034
Click the picture for link to "Thingiverse"
.
I was thinking of how a person might lash the pole to the railing in the most secure way when I discovered there actually is a product designed to do exactly this. The page says that it holds the umbrella steady as a rock, is simple to adjust or move, and is non-scratching... although, I don't know if it is actually for sale or at the invention stage. It looks like an invention website and there is no price that I can see. 
.
And further, for a homemade solution, look at what this fellow did over at the All-Purpose Flower Blog. He attached two PVC tubes to the railing so that the umbrella could be moved into different places on his balcony. What a great idea. I like that very much!
.
http://all-purpose-flower.blogspot.ca/2012/06/moving-umbrella-to-deck-railing.html
Click the pictures for link to "All-Purpose Flower"
.
With an umbrella on my railing I could have much more control over the heat on the deck, protecting my plants from the worst of it anyway, while also making it more pleasant to sit out there at the same time. 

Saturday 19 April 2014

Grow Grow Gadget Garden!

I went to the Minter Country Garden today and picked up some more plants and seeds for the balcony garden - plus three more bags of soil to lug up to the apartment. I've never really grown plants from seed before so we'll have to see how it goes. I bought Hot Pepper Mix, Sweet Pepper Mix, Climbing Beans, Carrots, Radish and Cucumber.
.
The peppers I should have read a little more closely because it says on the package that they have to be started indoors and won't be ready to transplant for around three weeks. So now I have eight cups filled with dirt and seeds on my window sill, seeing if they will grow. As I've said before, I've had mixed luck with peppers, but I've always bought them as seedlings first. Hey, why not take the plant I have the most difficulty with and make them even more difficult by starting them from seed? Oh well, if they don't work out, I'll just have to buy some seedlings in a few weeks. I really like peppers, but after two years of trying if I don't get some production this year I suspect it might be wise to try something else that's easier to grow.
.
.
I'm really excited about the dwarf blueberry bush I bought for $25. That's it in the above top left picture. I hope it works out well. It's supposed to grow one to two feet high in a compact spherical mound. In the container on the above right I planted a row of cucumbers close to railing (I'm going to try and grow them upwards) and I also planted two rows of carrots in the same container. 
.
.
In the next container I have climbing beans and radishes planted. The companion plant chart says that the two go well together. Radishes are really fast growing and should be ready to harvest in around three weeks. When they come out, I'll plant some more carrots in their place. Then, after the carrots come out in the summer, maybe I'll grow some more radishes before the fall.

In the above right picture is a dwarf thornless raspberry shrub I bought for $35. It is similar to the blueberry bush (same company) and should grow two to three feet high in a dense, compact mound. I also seen that they had grape vines for $40 that were designed for container growing. I really want a grape vine to grow on the back wall. I just love grapes so much. I remember when I was a kid living on Vancouver Island, at one of my friend's house they had an entire wall covered with grape vines. We'd go there after school and just hang-out and eat grapes until we were sick of them... and that took a long time because like I said, I love grapes. But, I didn't buy the grape vine. I had already dropped $100 on the blueberry and raspberry shrubs, the seeds and the soil, and that was enough for one day.
.
.
There's the potatoes, which I moved off to the side, and behind them, in the corner against the wall is a tomato plant and the container with kale.

Grow, grow gadget garden!

Now that the main part of the garden is underway, I can look at filling in small spaces with some more pots filled with herbs or flowers. In the coming weeks, I want to start hitting garage sales looking for a patio-table umbrella which I can lash to the railing, to provide some much needed shade on hot summer days. Also, I want to see if I can find some sort of shelving I can put against the balcony's glass-wall partition, so that next year I can go more vertical.

Tuesday 15 April 2014

First Planting

Well, now that there's soil out on the balcony, it doesn't seem like there's much reason to not have plants growing out there as well.
.
.
A friend stopped by and gave me four seed potatoes he had left over, which was a mighty nice thing for him to do. Later, I went to Newfie Speed & Sport (aka Canadian Tire) and bought a few more plants - some Great Lakes Lettuce, Mesclun Mixed Greens, two tomato plants (one cherry), and a few Red Russian Kale plants.
.
.
https://www.flickr.com/photos/spike55151/4799765572/
Photo from Spike55151 - click picture for link.
I also bought some Wave Petunias. I grew some flowers on the railing last year, but the year before I grew herbs in there and I was planning on growing herbs again this year. Then I read that plants like carrots, cucumbers, kale, peppers and radishes are dependent upon bees and other insects for pollination, so you should try to have a few flowers in between your vegetables to attract "pollinator insects." It makes sense to me. Several years ago now, when I was attending school in Alberta, I worked as a beekeeper for two summers. It was a fascinating job. I remember as well, how farmers would sometimes seek out my boss and ask him to start a bee-yard on their properties, because bees were so important in making the land produce well. The more bees hopping from plant to plant, the better things grow. Therefore, bring on the bees! In fact, I might buy a few more flowers to stick in between here and there. I have lots of little pots kicking around that I could use for flowers as well as herbs. Once I have the main garden going, we'll see about what else can be grown in between. 

I also bought one strawberry plant to fill in "the patch." I had three strawberry plants left over from last year in the one container, and it had room for one more. I actually got a lot of strawberries out of those three last year. I love strawberries, num num num, but regrettably I get an allergic reaction to them if I eat too many. Well, last year, there was always a few strawberries to pick every day and it didn't take more than a couple of weeks and I must have eaten too many. Wham! I broke out - just in time for guests from out of town to arrive too! Still, who can have a garden without strawberries? It would be an abomination! I'd like to grow more actually, and try to do other things with them than just pluck and eat them fresh, although that's pretty good too. They're fairly easy to grow and I could have more by getting a hanger or something that holds multiple pots and attaching it to one of the pillars on the side of the balcony. Another thing for next year's garden - these four will have to suffice for this year.

Saturday 12 April 2014

Soil for the Containers

The worst part of gardening on the balcony is, without a doubt, the chore of bringing stuff into the apartment from the car. Luckily, there's an elevator in the building which makes carrying heavy items like soil to the fourth floor a little easier, but still, it's a pain. I bought ten 25litre bags of potting soil the other day, then took one of the empty containers back to the car, which is parked about a half a block away from the building entrance, and put 3 bags of soil inside it to make them easier to carry. So, that was two trips with three bags, which nearly ripped my arms off by the time I got to the apartment door, and two trips with only two bags in the container, which was obviously a little easier. I really need to get a trolley or something. It's like this all the time. Groceries might take two or more trips up and down while bringing bottles & recycling to the depot sometimes takes four trips up and down. It's just ridiculous. Where's an empty shopping cart in the alley when you need one, eh?

Once the soil was on the balcony, the next task at hand was drilling drainage holes in the bottoms of the containers. The picture shows six holes in the bottom but a little while later I drilled two more holes on the bottom sides as well. I hope that's enough, but if it isn't I can always drill a few more holes into the sides.

.
One thing I have read which is a concern, however, is that plastic can deteriorate over the years from sitting in the sunlight. There is a lot of soil in these containers. They are 18 gallons (68litres), and it took two and a half bags of soil to fill each one. Now that I have drilled holes in them I have weakened them even further. I'm not really too worried about them not standing up for the purpose of gardening in them, but I want to make sure that when I move out of here one day, I don't just try to pick up the container full of soil, get half way out of the apartment, and have the bottom of the container tear apart on me. That would really suck! So when that day comes I'll have to be extra careful. I figure the best solution to this potential problem might simply be to go back to Walmart and buy a brand-new container, and then use it to put the other containers in for secure transportation out of the apartment. It's not like they cost a lot of money. These ones were $7.50 each, which sounds like a pretty cheap insurance policy against having a "soil disaster" on moving day. 
.
.
And voila! Dirt to play with! All I need now is my plastic beach pail & shovel, and perhaps some Tonka Toys.

I put a potting soil mix in the large containers. The containers I had from last year have a premium top soil mix in them, and I still had some left over which I used to to top them up. They should all be potting soil mix, rather than top soil. You can tell the difference right away. The top soil has little bits of bark and manure in it while the potting soil is nice and clean, with it's added nutrients quite visible. I've also read that potting soil is lighter than top soil. Well, I'm not going to just throw out the top soil, because plants still grew perfectly fine in it previously, but if I replace the soil in the future I will certainly use all potting soil mix. 

As you can see in the pictures, it's pouring rain outside. This is one nice thing about being on the balcony - you can be puttering around in your garden no matter the weather. Ha! Take that, you soaking wet in the backyard land-gardeners! Us sky-gardeners got you beat hands-down in this department, even if it also means regularly watering by hand. 
.
.
I'm not sure if I'm going to keep the containers positioned where they currently are. There are many ways I can arrange them, and in fact, I could easily stuff two more of these containers in between the others and have six of them on the balcony. Maybe next year. First we'll see how these four work out.

Sunday 6 April 2014

The Balcony Beacon - Linkshare

.
.
DIY: How to Plant a Personal Garden in a Small Urban Space -- Inhabitat - Many people bemoan the fact that they can’t grow their own food (or even flowers) because they lack any kind of garden space, but guess what? You can actually grow more than you realize in really small areas as long as they get a bit of direct sun. Hell, you can even grow things indoors under a lamp, but there’s something special about plucking your own food from a stalk that’s been sitting in summer sunshine all day. In any case, whether you have a little concrete slab behind your house, a fire escape outside your window, or even a tiny balcony, your urban garden can be a veritable Eden of fresh, healthy, home-grown vegetables, and herbs. (Read more).

Tips For Starting a Balcony Garden -- About.com Container Gardening - Balconies are usually microclimates, differing significantly from the climate on the ground. There can even be different microclimates even on a tiny balcony. If an area is shaded, that can be one climate, if another area is exposed to the wind, that is a different climate. Also, the conditions on balconies can be extreme with huge temperature fluctuations. Also, surface treatments can affect how hot or cool your balcony is and if it retains heat over time. (Read more).

10 Dirt Cheap Ways To Have a Gorgeous Balcony Garden -- Life On the Balcony - Take a good hard look at your food. Did you just pick up a container of heirloom tomatoes from the Farmer’s Market? A couple of those tomatoes have enough seeds to make quite a few plants. Also, some plants can be started from leftovers. For example, a new pineapple plant can be started from the top portion you sliced off before eating it. (Read more)

Add These Flowers To Your Vegetable Garden -- Homestead RevivalIt's amazing how many of our vegetables actually require an insect to pollinate them: broccoli, brussel sprouts, cabbage, carrots, cauliflower, collards, cucumbers, eggplants, kale, melons, okra, onions, peas, peppers, pumpkins, radishes, squash, and tomatoes! And while all of these don't necessarily need pollinating for you to enjoy them, those that produce fruits definitely benefit from happy pollinators. (Read more).
.
Should I Put Gravel In The Bottom of My Container Pots? -- About.com - According to Dr. Linda Chalker-Scott, "gravitational water will not move from a finely soil texture into a coarser material until the finer soil is saturated. Since the stated goal for using coarse material in the bottoms of containers is to “keep soil from getting water logged,” it is ironic that adding this material will induce the very state it is intended to prevent. (Read more)
.
.
Ask Mavis Your Gardening Questions - How To Grow Potatoes -- One Hundred Dollars a Month -
Having different sized eyes on different potatoes doesn’t really matter too much.  As long as they have “eyes” they are ready to plant.  If you decide to cut your larger seed potatoes into smaller bits, cut with a clean knife, making sure each bit has at least two eyes. Then, allow them to sit in a cool dark place for 24 hours so that they can callous {which helps prevent them from being susceptible to disease once you put them in the ground}.  Also, if you aren’t ready to plant quite yet, just store your seed potatoes in the fridge until you are. (Read More)
.
How to Grow Seed Potatoes {Start to Finish} -- One Hundred Dollars a Month - If you’ve never grown potatoes before {or just need a little refresher course} here’s how to grow them. (Read More).
.
The Planting Experiment: Organic vs. Non-Organic Soil -- eHow - Have you ever wondered if your plants would grow better in organic soil versus regular potting soil? Do you think all those manufactured fertilizers and chemicals really help plants grow bigger, better and faster, or is it just a myth? (Read More).
.
Garden Like Your Life Depends On It -- Organic Prepper - Generally speaking, all [the space] that is needed is one 4x4 bed for salad greens and one 4x4 bed for vegetables for each adult. See? It requires little space for the basics. (Read More)
You don’t need to have this much space dedicated to veggies. Generally speaking, all that is needed is one 4×4 bed for salad greens and one 4×4 bed for vegetables for each adult. See? It requires little space for the basics. - See more at: http://www.theorganicprepper.ca/garden-like-your-life-depends-on-it-04042014#sthash.xeq50jrc.dpuf
.
DIY - How to Make a Compost Tumbler -- One Hundred Dollars a Month - There are a million different versions of compost bins you could make, but the main ingredients to make a successful compost bin are air, the combination of ingredients, and turning your pile. (Read More

Wednesday 2 April 2014

The Rubbermaid Solution for Large Plant-Containers

Well, as I said last time, I was off to Walmart to do some Rubbermaid browsing. Indeed, I believe this is a good solution. I found a selection of a non-brand-name plastic containers, like Rubbermaid, but cheaper. For the low price of $7.50 each plus tax, I purchased these four containers, including the lids. The total for all four came to $33.46 after tax.
.
.
I think these containers will do very well for me. I'm thinking potatoes, carrots, broccoli and kale. Maybe I'll even buy another one or two later, to experiment with. There is room. I'm also glad I was able to find something relatively light coloured, since this balcony gets so hot in the height of summer. Gardening pots are black and as such, attract heat which might cook the roots in the pot. So the lighter the colour the better, I figure.  

I also stopped by the hardware store Rona today and purchased three five-gallon pails. They were $3.99 each for the three pails, and I bought one lid for $3.29. I was going to buy five pails and three lids, but figured I'd hold off for a little while just to see how much space develops on the deck. I am considering using two of these pails to plant vines, with wooden trellises staked into them, and placing them along the back wall of the deck. The lids would fit nicely underneath as a tray to capture drainage water.

But also, I want to start a compost bucket with one. As well, being out on the balcony, I have no wheelbarrow. Bringing stuff in, or refuse out, is kind of a pain in the butt, so I figured two sturdy buckets would do better than garbage bags for this purpose, and they can be neatly stacked underneath the bucket that will hold compost when they are not being used. So, I bought three for now, and I might buy two more later to use as pots for the vines. In the meantime, I'm going to test them out this weekend by going to the river to get some gravel for the bottoms of my containers. Hopefully, I can have the containers ready for plants to go in them by the beginning of next week.    

Tuesday 1 April 2014

A Balcony Gone to Pot

.
I've acquired another four pots for the floor plus one hanging pot after a visit to my mom. She's not going to be growing flowers on her patio this year and graciously decided to donate her pots to my little balcony project. These are a little larger than what I've used before, which is good. The pots I had were far too small for what I am thinking of doing. I think the two large round pots will do nicely for the blueberry and raspberry bushes I seen at the Minter Country Garden when I was there the other day. Also, I read an article today claiming that blueberries do very well on balconies, which makes me even more excited to try them. The two square pots I think could be used for trying my "trellis up the railing idea" by growing beans or cucumbers up a wire trellis attached to the railing, both for space conservation and attempting to create some shade areas in this full-sun area. I've also got a few margarine containers which I am thinking of growing some herbs in. Their small size means I can stuff them into whatever nook and cranny is available after the main pots are in place.
.
I've been looking at the space on the balcony and I'm thinking of changing my plans a little. I was going to use two large 25 gallon pots placed side by side along the glass wall, and then stuffing in other smaller pots around them. One problem with just sticking the pots out there though, is there is no "tray" to put underneath them to catch water running out of the drainage holes in the bottom. I've run into this with the pots I've had out there already - and I hate having dirty water spilling all over the deck. What makes it worse is that I share this balcony with a neighbour, and the last thing I want is for dirty water from my plants to run underneath the partition and onto his portion of the balcony. So, I had been contemplating building a tray myself, large enough to fit under both pots. I figured I could go to the hardware store and pick up a piece of plywood and some 1" strips of lumber to frame a ridge around the edges, then wrap plastic around the strips and screw them in place. I think that should do the trick to contain the water - although, it wastes some floor space putting round pots on a large, rectangular tray. I think this could be overcome by making some shims of the same height, to balance out any smaller pots that would be able to be stuffed around the big pots, but wouldn't fit fully inside (or outside) of the homemade water tray.  

Then I started thinking, "Hmmmm, what else could I use to grow in besides these round pots?"

What I am wondering is if those big Rubbermaid boxes would work better. They already have a lid on them, so I can just put that underneath the box and presto, a tray! I wonder if there will be enough space underneath for proper draining, though, but I think I could overcome this by simple cutting a few flat strips of wood to place beneath, just to get a little space between the lid and the bottom and make drainage easier. Another thing I like about this idea is that they are rectangular and using squares is a more efficient way to cover floor space than with circles. Also, since the Rubbermaid boxes would be a bit smaller, I might be able to put four of them out there, each with their own crop in them, like carrots, kale or broccoli, rather than seeing if I can grow two types of veggies in the same pot. It would be much easier if each pot simply took care of it's own plant, rather than sharing its space and treatment with another. Also, by going a little smaller in size and using more containers, I will have more flexibility in re-arranging things down the road if certain plants demand it. Once those big 25 gallon pots would be in there, they would have to stay put, as there is not much other space where they could go, especially with a big, honkin' homemade tray underneath them. 

It looks like a trip to Walmart is in order tonight, to go browse the Rubbermaid section.